Chapter 11: Arrays

  1. From Variables to Arrays
    1. Example 11-1: Many Variables
    2. Example 11-2: Too Many Variables
    3. Example 11-3: Arrays, Not Variables
  2. Make an Array
    1. Example 11-4: Declare and Assign and Array
    2. Example 11-5: Compact Array Assignment
    3. Example 11-6: Assigning and Array in On Go
    4. Example 11-7: Revisiting the First Example
  3. Repetition and Arrays
    1. Example 11-8: Filling and Array in a for Loop
    2. Example 11-9: Track Mouse Movements
  4. Arrays of Objects
    1. Example 11-10: Managing Many Objects
    2. Example 11-11: A New Way to Manage Objects
    3. Example 11-12: Sequences of Images
  5. Robot 9: Arrays

From Variables to Arrays

Like variables, arrays must have a specified datatype (int, float, boolean, color, etc).

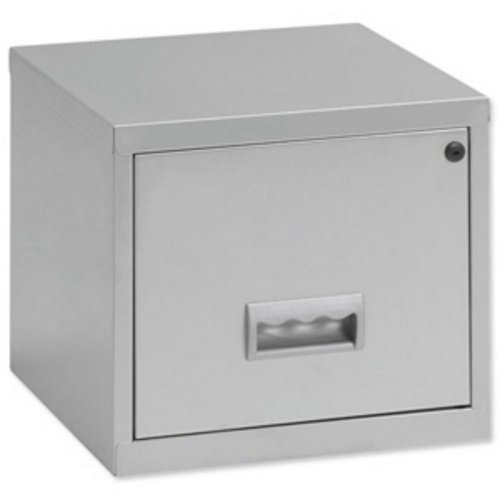
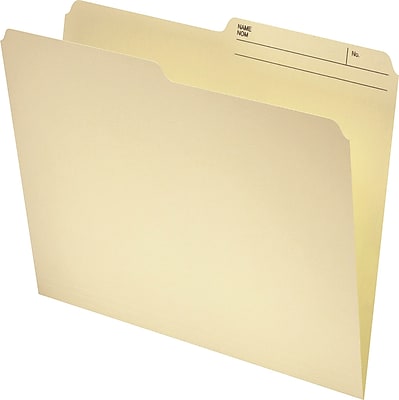
Arrays are like a filing cabinet filled with folders, each folder holding the data of a variable.

Arrays can have as many elements (variable containers) as you want. We'll do an example that has 3000!. Like all things programming, arrays have to follow certain rules:

Lots of Variables

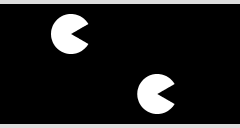
Let's setup up an example to show how powerful and helpful arrays can be. First, we'll do a version without arrays.

PROCESSING

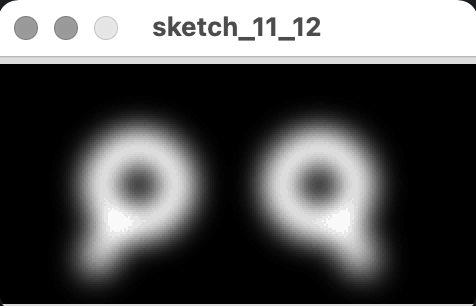
Example 11-1: Many Variables

float x1 = -20;
float x2 = 20;
int r = 40;

void setup() {
  size(240, 120);
  noStroke();
}

void draw() {
  background(0);
  x1 += 0.5;
  x2 += 0.75;
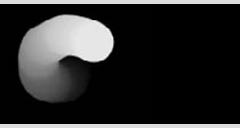
  arc(x1, 30, r, r, 0.52, 5.76);
  arc(x2, 90, r, r, 0.52, 5.76);
  // Lets add a wrap around
  if(x1 > width + r) { x1 = -r; }
  if(x2 > width + r) { x2 = -r; }
}
Too Many Variables

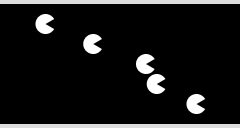
Next well do a version that has lots of variables—too many, in fact, and ripe for using an array...

PROCESSING

Example 11-2: Too Many Variables

float x1 = -10;
float x2 = 10;
float x3 = 35;
float x4 = 18;
float x5 = 30;
int r = 20;

void setup() {
  size(240, 120);
  noStroke();
}

void draw() {
  background(0);
  x1 += 0.5;
  x2 += 0.75;
  x3 += 1.0;
  x4 += 1.25;
  x5 += 1.5;
  arc(x1, 20, r, r, 0.52, 5.76);
  arc(x2, 40, r, r, 0.52, 5.76);
  arc(x3, 60, r, r, 0.52, 5.76);
  arc(x4, 80, r, r, 0.52, 5.76);
  arc(x5, 100, r, r, 0.52, 5.76);
  // Lets add a wrap around
  if(x1 > width + r) { x1 = -r; }
  if(x2 > width + r) { x2 = -r; }
  if(x3 > width + r) { x3 = -r; }
  if(x4 > width + r) { x4 = -r; }
  if(x5 > width + r) { x5 = -r; }
}
Arrays, Not Variables

Now let's do the same thing, but with an array to hold all those variable values.

PROCESSING

Example 11-3: Arrays, Not Variables

float [] xArray = new float[3000]; // Declare an Array variable with []
int r = 12;

void setup() {
  size(240, 120);
  noStroke();
  fill(255,128); // transparent packmen
  // pack the array with 3000 random values between -1000 and 200
  for (int i = 0; i < xArray.length; i++) {
    xArray[i] = random(-1000, 200); 
  }
}

void draw() {
  background(0);
  for (int i=0; i < xArray.length; i++) {
    xArray[i] += 0.05;
    float yPos = i * 0.04;
    arc(xArray[i], yPos, r, r, 0.52, 5.76);
  }
}

Playing with Example 11-3

And let's modify the draw loop a bit to get something more visually interesting...

PROCESSING

Example 11-3: Modified

void draw() {
  background(0);
  for (int i=0; i < xArray.length; i++) {
    xArray[i] += 0.05 * (i/10);
    if (xArray[i] > width * 10) {xArray[i] = 0; }
    float yPos = i * 0.04;
    arc(xArray[i], yPos, r, r, 0.52, 5.76);
  }
}

How To Make An Array

We talked about this at the top of this lecture, but to review:

Here's four different datatypes of arrays:

int[] bunnyArray;
float[] xValArray;
boolean[] trueFalseArray;
PImage[] myImagesArray;

Each array can store only one type of data

Declare, Assign and Populate an Array

PROCESSING

Example 11-4: Declare and Assign an Array

int[] xArray;           // Declare an array

void setup() {
  size(200, 200);
  xArray = new int[2];  // Create the array with two holders
  xArray[0] = 12;       // Assign the first value
  xArray[1] = 2;        // Assign the second value
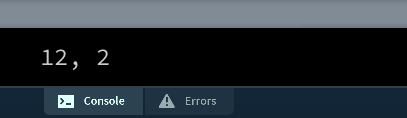
  println(xArray[0] + ", " + xArray[1]);
}

Compact Array Assignment

Here we'll do exactly the same thing, but both declare and assign the array in a single line of code

PROCESSING

Example 11-5: Compact Array Assignment

int[] xArray = new int[2];  // Declare and create the array

void setup() {
  size(200, 200);  
  xArray[0] = 12;       // Assign the first value
  xArray[1] = 2;        // Assign the second value
  println(xArray[0] + ", " + xArray[1]);
}

Declare, assign and populate an Array in One Go

You can also compress the assembly of an array into a single pass, thusly...

PROCESSING

Example 11-6: Assigning and Array in One Go

int[] xArray = { 12, 2 };  // Declare, create, and assign array

void setup() {
  size(200, 200);  
  println(xArray[0] + ", " + xArray[1]);
}

NOTE: Avoid creating arrays in the draw() loop, it will slow down the frame rate!

Revisiting the First Example

PROCESSING

Example 11-7: Revisiting the First Example

float[] xArray = { -20, 20 };  // Declare, create, and assign array

void setup() {
  size(240, 120);  
  noStroke();
}

void draw() {
  background(0);
  xArray[0] += 0.5;  // Increase the first element
  xArray[1] += 0.5;  // Increase the second element
  arc(xArray[0], 30, 40, 40, 0.52, 5.76);
  arc(xArray[1], 90, 40, 40, 0.52, 5.76);
  // Wraparound
  if (xArray[0] > width + 20) { xArray[0] = -20; }
  if (xArray[1] > width + 20) { xArray[1] = -20; }
}

Repetition And Arrays: Filling an Array in a For Loop

Fun with lines of random colors

PROCESSING

Example 11-8: Filling an Array in a for Loop

float[] grayArray;

void setup() {
  size(240, 120);
  grayArray = new float[width];
  for (int i = 0; i < grayArray.length; i++ ) {
    grayArray[i] = random(0, 255);
  }
}

void draw() {
  for (int i = 0; i < grayArray.length; i++) {
    stroke(grayArray[i]);
    line(i, 0, i, height); // draw vertical lines
  }
}

Track Mouse Movements

This one is fun!

PROCESSING

Example 11-9: Track Mouse Movement

int num = 60;
int[] xArray = new int[num];
int[] yArray = new int[num];

void setup() {
  size(240, 120);
  noStroke();
}

void draw() {
  background(0);
  // Copy array values from back to front
  // So i will start at 59 and decrement down to 1
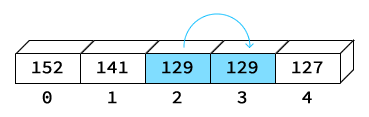
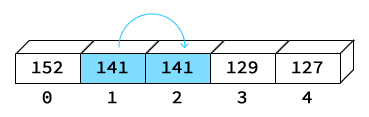
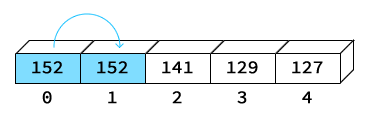
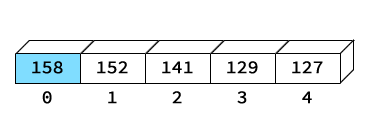
  for (int i = xArray.length-1; i > 0; i--) {
    // Sets the array element to the value of the 
    // previous array element
    xArray[i] = xArray[i-1]; 
    yArray[i] = yArray[i-1];
  }
  xArray[0] = mouseX; // Set the first element
  yArray[0] = mouseY; 
  for (int i = 0; i < xArray.length; i++) {
    fill(i*4); // Between 0 and 360
    ellipse(xArray[i], yArray[i], 40, 40);
  }
}

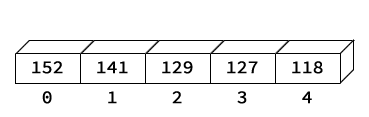
Original array

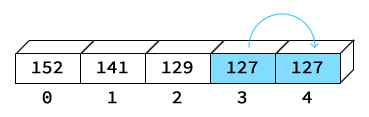
Start the loop, copy the second-to-last value into the last position (3 into 4).

Second time through the loop, copy element 2 into element 3.

Third time through copy element 1 into element 2.

Fourth and last time through the loop, copy element 0 into element 1.

Copy the new mouseX value into element 0.

Arrays of Objects

This example brings together every major programming concept in our textbook:

PROCESSING

Example 11-10: Managing Many Objects

JitterBug[] bugs = new JitterBug[33];

void setup() {
 size(240, 120);
 for (int i = 0; i < bugs.length; i++) {
   float x = random(width);
   float y = random(height);
   int r = i + 2;
 bugs[i] = new JitterBug(x, y, r);
 }
}

void draw() {
 for (int i = 0; i < bugs.length; i++) {
 bugs[i].move();
 bugs[i].display();
 }
}

// Insert Jitterbug class from Example 10-1

And here's the code for the JitterBug class from Example 10-1:

PROCESSING

Example 10-1: JitterBug class

class JitterBug {
  float x;
  float y;
  int diameter;
  float speed = 2.5;
  
  JitterBug(float tempX, float tempY, int tempDiameter) {
    x = tempX;
    y = tempY;
    diameter = tempDiameter;
  }
  
  void move() {
    x += random(-speed, speed);
    y += random(-speed, speed);
  }
  
  void display() {
    ellipse(x, y, diameter, diameter);
  }
}
Resulting Display Window

More Management

A better for loop for the bugs

PROCESSING

Example 11-11: A New Way to Manage Objects

JitterBug[] bugs = new JitterBug[33];

void setup() {
  size(240, 120);
  for (int i = 0; i < bugs.length; i++) {
    float x = random(width);
    float y = random(height);
    int r = i + 2;
  bugs[i] = new JitterBug(x, y, r);
  }
}

void draw() {
  for (Jitterbug b : bugs) {
  b.move();
  b.display();
  }
}

// Insert Jitterbug class from Example 10-1
class JitterBug {
  float x;
  float y;
  int diameter;
  float speed = 2.5;
  
  JitterBug(float tempX, float tempY, int tempDiameter) {
    x = tempX;
    y = tempY;
    diameter = tempDiameter;
  }
  
  void move() {
    x += random(-speed, speed);
    y += random(-speed, speed);
  }
  
  void display() {
    ellipse(x, y, diameter, diameter);
  }
}
Resulting Display Window

media.zip file with images in it for the following Example 12-12

PROCESSING

Example 12-12: Sequences of Images

int numFrames = 12; // The number of frames
PImage[] images = new PImage[numFrames]; // Make the array
int currentFrame = 0;
void setup() {
  size(240, 120);
  for (int i = 0; i < images.length; i++) {
    String imageName = "frame-" + nf(i, 4) + ".png";
    images[i] = loadImage(imageName); // Load each image
  }
  frameRate(24);
}
void draw() {
  image(images[currentFrame], 0, 0);
  currentFrame++; // Next frame
  if (currentFrame == images.length) {
    currentFrame = 0; // Return to first frame
  }
}
Resulting Display Window

Robot 09: Arrays

Link to download robot1.svg (if it opens in the browser, save it with the File menu)

PROCESSING

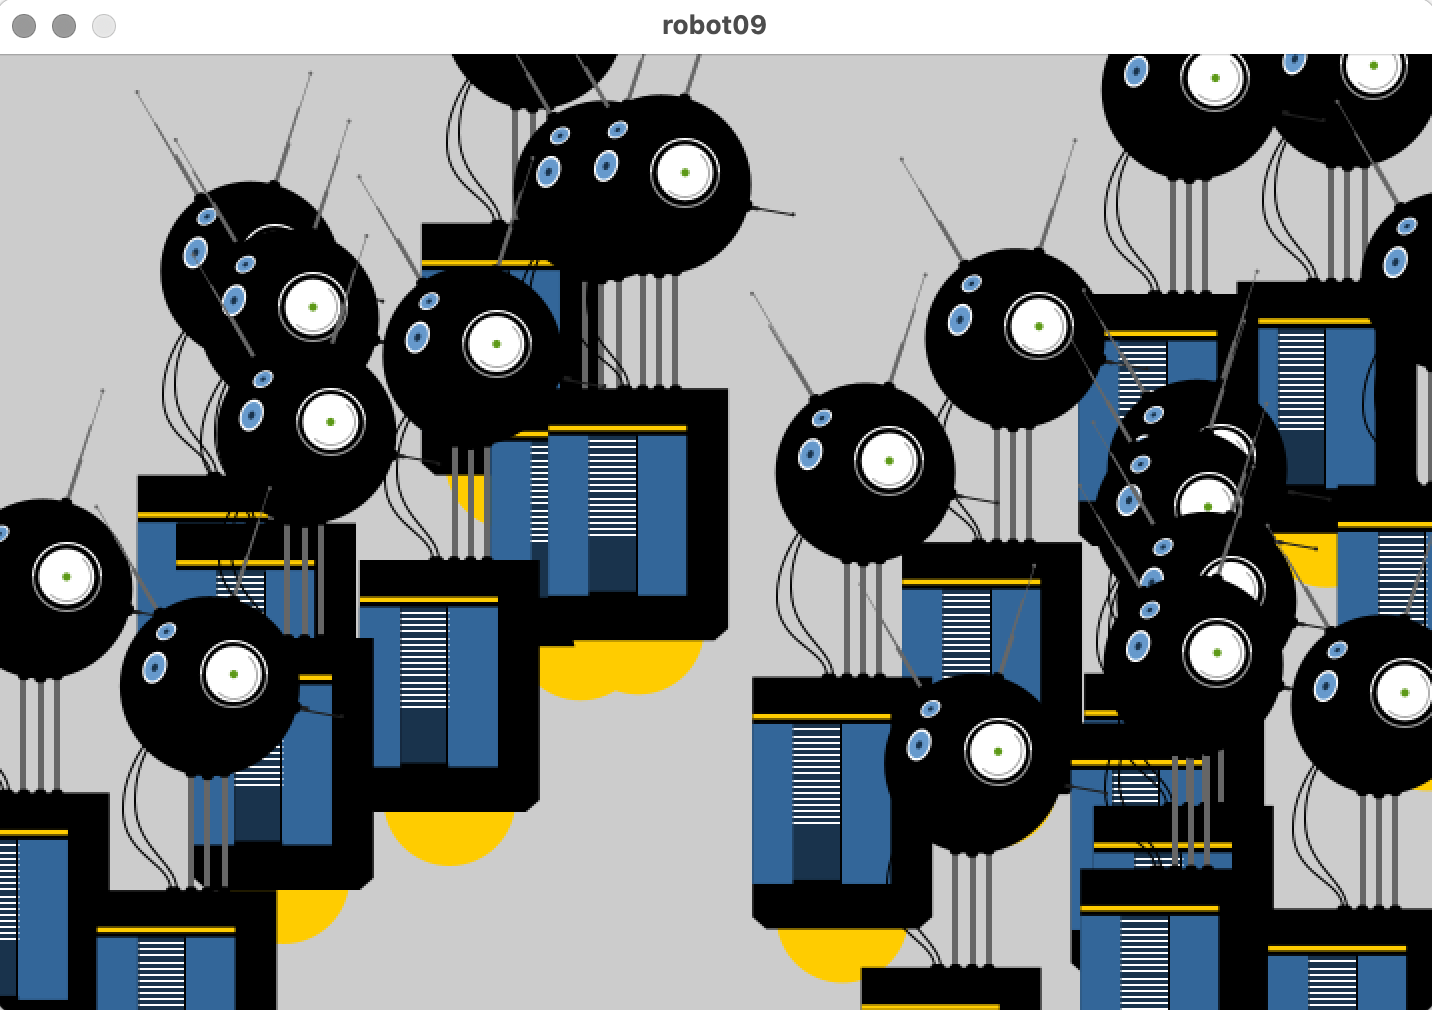
Robot 9: Arrays

Robot[] bots;  // Declare array of Robot objects

void setup() {
  size(720, 480);
  PShape robotShape = loadShape("robot1.svg");
  // Create the array of Robot objects
  bots = new Robot[20];
  // Create each object
  for (int i = 0; i < bots.length; i++) {
    // Create a random x-coordinate
    float x = random(-40, width-40);
    // Assign the y-coordinate based on the order
    float y = map(i, 0, bots.length, -100, height-200);
    bots[i] = new Robot(robotShape, x, y);
}
smooth(); }

void draw() {
  background(204);
  // Update and display each bot in the array
  for (int i = 0; i < bots.length; i++) {
    bots[i].update();
    bots[i].display();
  }
}

class Robot {
  float xpos;
  float ypos;
  float angle;
  PShape botShape;
  float yoffset = 0.0;
  // Set initial values in constructor
  Robot(PShape shape, float tempX, float tempY) {
    botShape = shape;
    xpos = tempX;
    ypos = tempY;
    angle = random(0, TWO_PI);
}

// Update the fields
  void update() {
    angle += 0.05;
    yoffset = sin(angle) * 20;
  }
  // Draw the robot to the screen
  void display() {
    shape(botShape, xpos, ypos + yoffset);
  }
}
Resulting Display Window
Previous Chapter
Next Chapter