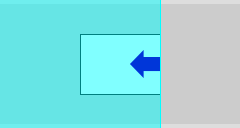
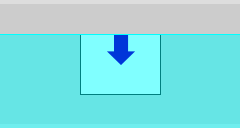
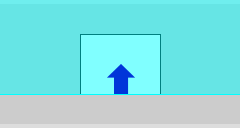
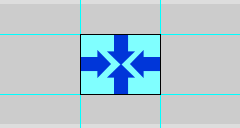
Code that responsds to input from the user (mouse, keyboard, and other devices) must run continuously, seeking out those inputs in real time. Processing has a special function dedicated to this called draw().
PROCESSING
Psuedo-code
void draw() {
   // A bunch of stuff, also known as a block of code
}
Any block of code (that is, lines of code inside the brackets), runs continuously in the Display Window when you run your code in the PDE. Each trip through the draw() function is called a frame. This is a lot like Adobe Animate/Flash! You can even set the frame rate of playback (although the default is 60fps).
Let's try something...
PROCESSING
Example 5-1: The draw() Function
void draw() {
 // Displays the frame count to the Console
 println("I’m drawing");
 println(frameCount);
}
Which will output text into the console window (the window below the editing section of the PDE):
CONSOLE OUTPUT
I'm drawing
1
I'm drawing
2
I'm drawing
3
And so on, forever or until we stop the program.
The setup() Function
The setup() function compliments the draw() function by being run only once at the beginning of a Sketch, and it, well, sets up the Sketch with things like Display Window size.
While setup() and draw() pair together nicely, there's a GOTCHA rule (codeing is full of these, like forgetting semi-colons) which is: Variables inside functions only work inside that function.
Which means if we set up variables inside the setup() function, draw() won't be able to use them. To get around this, its customary to put the variables you'll need for draw() at the top of the Sketch, and not inside the setup() function. Variables like this are called Global Variables.
PROCESSING
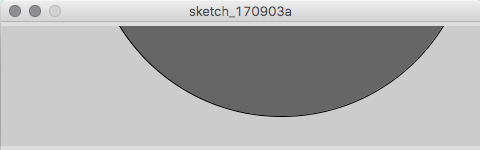
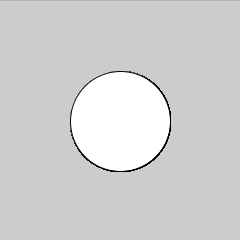
Example 5-3: Global Variable
int x = 280;
int y = -100;
int diameter = 380;

void setup() {
   size(480, 120);
   fill(102);
}

void draw() {
   background(204);
   ellipse(x, y, diameter, diameter);
}
Follow (The Mouse)
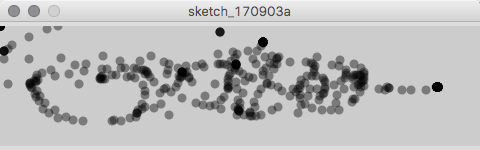
By having a running draw() loop, we can track interactions with the computer, like Mouse movement. Processing can access the current mouse x and y coordinates with the environmental variables, mouseX and mouseY (note the capital X and Y, it won't work without the proper capitalization). Here we'll just draw an ellipse to the Display Window 65 times per second (theoretically):
Cool tricks: Connect the Dots For Continuous Drawing
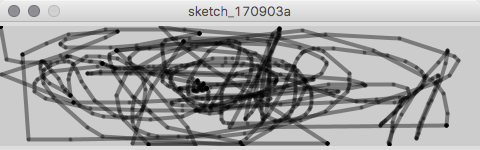
So here instead of drawing an ellipse every frame, we'll draw a line whose starting x,y is the current mouseX and mouseY and whose ending x,y is the previous mouseX and mouseY from a 65th of a second ago, which Processing has a special environmental variable for: pmouseX and pmouseY.
Processing has a lot of built-in functions to make our coding lives easier. Half the fun of using Processing is discovering what cool little widgets lie within. This time, let's try dist() (short for distance). It takes two x/y locations and returns the distance between them. Try this:
Interesting, but what to do with it? How about if we use the value to change the size of the ellipse we're drawing with some draw() code? Since the faster you move the mouse, the further apart the points are, you can use that measurement to set the size of strokeWeight():
Or you could use dist() to change the opacity of the line, or the grayscale color...
New Concept: Easing
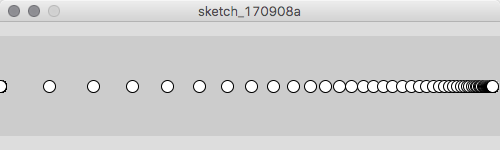
Sometimes we need to smooth out the motion of an object, otherwise it just jumps around and feels jerky. In coding this is called "easing" and is accomplished thusly:
A couple of new things in this. We use float in declaring our variables because it's a number that resolves to numbers that need a decimal place. We also declare the xVal variable without assigning it a value. There's no need to because it gets set in the draw() block of code.
There's also some new methods revealed in the println(targetX + " : " + ) function. println() will output what's between the two parenthesi
s to the console window in the PDE following a few rules. You can string values together in the output by putting plus signs between the values, as in:
println(valueA + valueB + valueC)
Which would output whatever those three values are to the console. But usually that's not useful because you need a space or other text between the outputted values. To insert text between values you use "some text", with a fairly standard technique of using ", " to put a comma and space between the values or " : " to put a space-colon-space between the values.
Let's try a version that eases on both the x and y axis:
Now let's modify it to not leave trails of ellipses when you drag the mouse around. Simple enough, in Processing you simply refresh the Display Window's background color with background(NN); where NN is the grayscale number of the color.
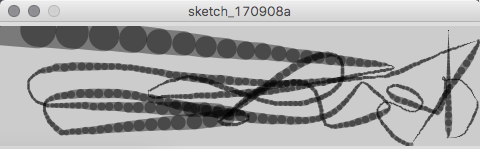
Now that we have a technique for easing, or what is known in coding terms as an algorithm, we can apply it to other problems as well, like the coarse and chunky lines from the previous sketch.
You can get a lot of variation in this by modifying the easingVal variable.
Click The Mouse
Now let's get into if/then statement (a close cousin to if/then/else). The Display Window can detect when a mouse click occurs inside itself. The environmental variable mousePressed holds a boolean value of true or false that reveals the current status of the mouse button when it's inside the Document Window. Note that it will be true as long as the mouse button is held down, not just at the moment it's pressed.
And here's that bizarre == test, which tests to see if something is true or not by one value being equal to another value.
Interestingly, you could also do the test simply as:
Example 5-10: Click The Mouse Decontstructed
PROCESSING
Example 5-11: Detect When Not Clicked
if (mousePressed) {
  stroke(0);
}
This works because the if test is looking to see if what's between the parantheses is true or false. So boolean variables like mousePressed will return true or false, which the if() test can evaluate as true or false.
A Word Of Caution
The == test compares the values on the left and right to test whether they are equivalent. IT IS NOT THE SAME AS = !
Review of Logical Operators for
if() tests
A > B
is A greater than B
A < B
is A less than B
A >= B
is A greater or equal to B
A <= B
is A less than or equal to B
A == B
is A equal to B. Yes, that's right, two = signs, not one. One equal sign assigns a value and doesn't test two values.
A != B
is A not equal to B Believe it or not, this can come in really handy
Detect When Not Clicked
A Single if/then block gives you the choice of running some code or not running it. But to run two different blocks of code based on the true or
false test, you can use an if/then/else block. When the if test is true, it does one block of code, but when it's false it does a different block of code. Thusly...
While mousePressed gives us the status of any mouse button, the environment variable mouseButton returns a value of either LEFT or RIGHT, which can be tested...
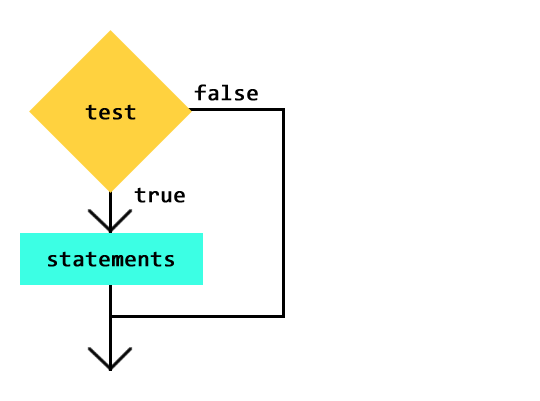
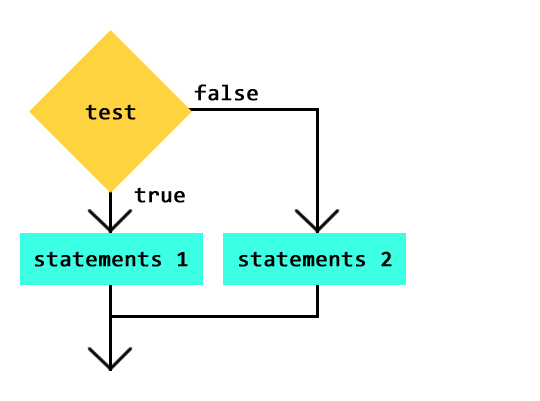
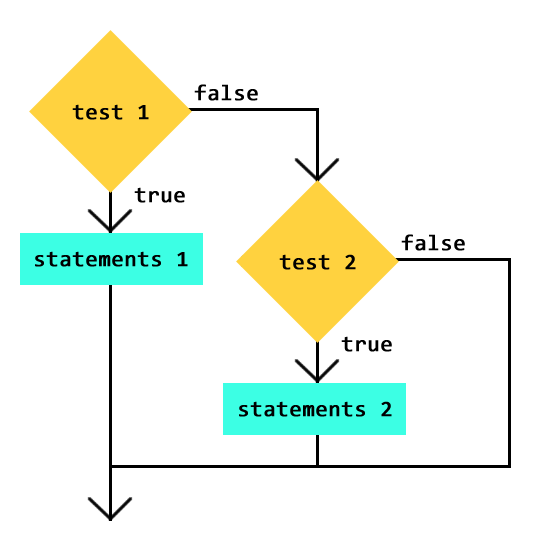
The use of if/then/else blocks are very powerful, and are a lot of what coding is about. Here's some flow diagrams of how they can work:
These flow diagrams correspond to the code on the right:
if (test) { statements }
if (test) { statements 1 } else { statements 2 }
if (test 1) { statements 1 } else if (test 2) { statements 2 }
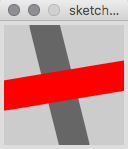
We'll play a lot more with these blocks! Let's try one more variation just for grins...
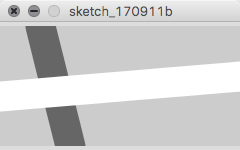
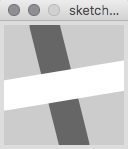
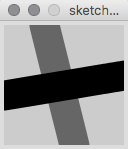
PROCESSING SKETCH
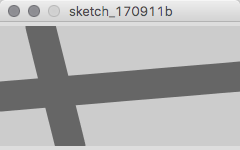
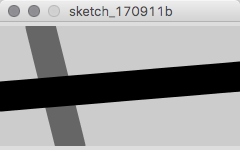
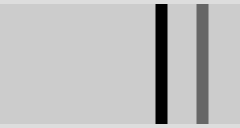
Example 5-12: Variations
void setup() {
   size(120, 120);
   strokeWeight(30);
}

void draw() {
   background(204);
   stroke(102);
   line(40, 0, 70, height);
   if (mousePressed == true) {
      if (mouseButton == LEFT) {
         stroke(255)
      } else if (mouseButton == RIGHT) {
         stroke(0);
      } else { // This will detect if the center button is pressed
	     stroke(#ff0000);
   }
   line(0, 70, width, 50);
}
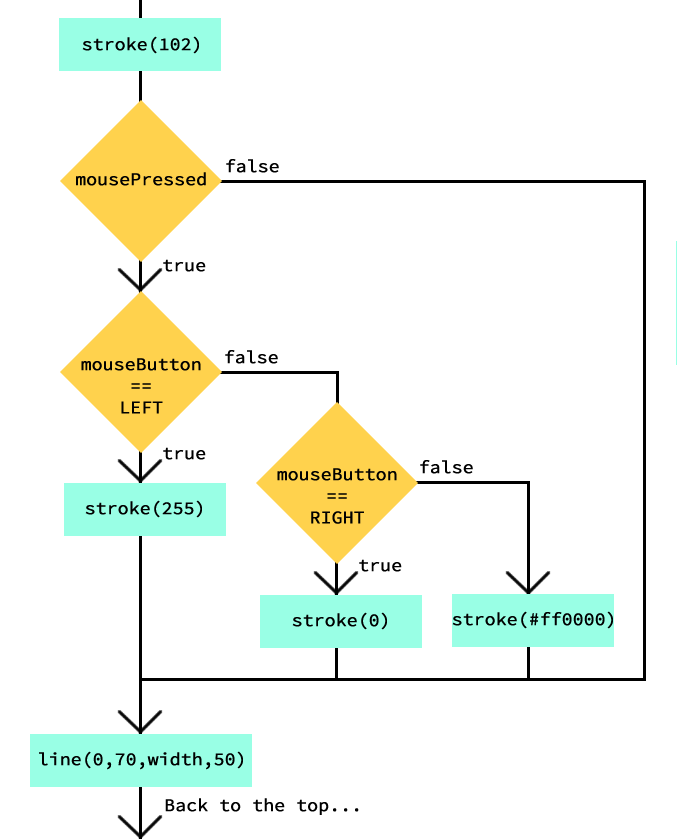
If we flowchart the above, this is how it would look (logic-wise):
Location
We now know lots of stuff about the mouse, like if a button is pressed, which button is pressed, and where is the pointer relative to the Display Window, which we get from mouseX and mouseY. We can test the mouse location and respond to it with an if statement. Our text does this interesting trick:
PROCESSING
Example 5-13: Find the Cursor
float xVal;
int offsetVal = 10;

void setup() {
   size(240,120);
   xVal = width/2; // xVal is in the center
}

void draw() {
   background(204);
   if (mouseX > xVal) {
      xVal += 0.5;
      offsetVal = -10;
   }
   if (mouseX < xVal) {
      xVal -= 0.5;
      offsetVal = 10;
   }
   // Draw arrow left or right depending on "offsetVal"
   line(xVal, 0, xVal, height);
   line(mouseX, mouseY, mouseX + offsetVal, mouseY - 10);
   line(mouseX, mouseY, mouseX + offsetVal, mouseY + 10);
   line(mouseX, mouseY, mouseX + (offsetVal*3), mouseY);
}
Finding the edges of a circle
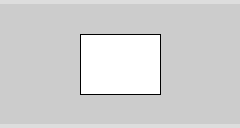
To find whether or not the mouse is inside a circle, we need to do some fancy jiggery-pokery with the dist() function. We can get the distance from the center of the circle and test to see if it's less than radius of the circle. If it is, it's inside!
PROCESSING
Example 5-14: The Bounds of a Circle
int xVal = 120;
int yVal = 120;
int myRadius = 50;

void setup() {
  size(240, 240);
  ellipseMode(RADIUS); // Draws ellipse from center out
}
void draw() {
  float myDistance = dist(mouseX, mouseY, xVal, yVal);
  if (myDistance < myRadius) {
    fill(0);
  } else {
    fill(255);
  }
  ellipse(xVal, yVal, myRadius, myRadius);
}
Let's beef that up a bit by making the circle change size when it's rolled over by the mouse
PROCESSING
Example 5-14: The Bounds of a Circle Variation
int xVal = 120;
int yVal = 120;
int myRadius = 10;

void setup() {
  size(240, 240);
  ellipseMode(RADIUS); // Draws ellipse from center out
}
void draw() {
  background(204);
  float myDistance = dist(mouseX, mouseY, xVal, yVal);
  if (myDistance < myRadius) {
    myRadius++;
    fill(0);
  } else {
    fill(255);
  }
  ellipse(xVal, yVal, myRadius, myRadius);
}
Note that this only works with perfect circles, and won't work with an ellipse whose width and height are not equal. The math for that is crazy hard.
Finding the bounds of a rectangle
We'll use a different approach to find the boundind edges of a rectangle. For that, you have to check for multiple conditions to be true, which will introduce us to some new logic for our if() statement.
The logic operator we'll use is &&, which is a logical and. It's only true when what on either side of the && is true. Like so:
Value
Test
Value
Result
true
&&
true
true
true
&&
false
false
false
&&
true
false
false
&&
false
false
Value
Test
Value
Test
Value
Result
true
&&
true
&&
true
true
true
&&
true
&&
false
false
true
&&
false
&&
false
false
false
&&
false
&&
false
false
etc.
PROCESSING
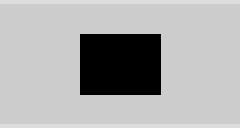
Example 5-15: The Bounds of a Rectangle
int myWidth = 80;
int myHeight = 60;
int xVal = 80;
int yVal = 30;
void setup() {
  size(240, 120);
}
void draw() {
  background(204);
  // the && test means both sides
  // of the && test must be true.
  // In this case, all four test have to be true
  // for the if statement to resolve to true
  if ((mouseX > xVal) &&
      (mouseX < xVal + myWidth) &&
      (mouseY > yVal) &&
      (mouseY < yVal + myHeight)) {
    fill(0);
  } else {
    fill(255);
  }
  rect(xVal, yVal, myWidth, myHeight);
}
Processing can get input from the keyboard as well as the mouse. The keyPressed environmental variable tells Processing that key has been pressed in the form of a boolean datatype (true or false).
keyPressed like mousePressed will tell us if something has been pressed or not. To find out what key was actually pressed, we use the environmental variable key. It is a variable with the data type of char. You declare and assign a char variable thusly:
char myChar = 'M'; // Declares and assigns 'M' to the variable myChar
But these two misguided attempts at assigning a char variable will fail:
char myChar = "M"; // Double quotes are used for strings
char myChar = M; // would imply that M is a variable
Unlike the boolean variable keyPressed, which reverts to false each time a key is released, the key variable holds its value until another key is pressed.
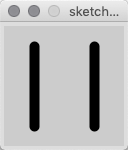
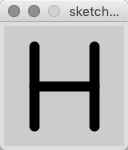
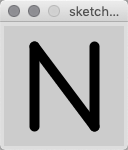
In the following code introduces the textSize() function to set the size of the letters we're going to display in the Display Window, the textAlign() function to set the alignment of the text (centered, in this case), and the text() function to display the letter.
Notice that some keys produce a blank screen (like the spacebar) and others produce a white rectangle (like the arrow keys). Also, notice what happens when you use the shift key for a capital letter...
Checking for Specific Keys
The char type variable can be tested to see what character it holds, but you have to use the single-quote convention for the logic test
This sketch also introduces another logic operator like &&, the double vertical line. The vertical line character is called a pipe. Two in succession create the logic operator of or, as in this or that.
The logic or operator works as shown in the table on the left.
Detecting Odd-Ball Keys
Some keys are harder to detect beause they aren't tied to a particular letter, these include:
UP arrow
DOWN arrow
LEFT arrow
RIGHT arrow
ALT/OPTION
CONTROL
SHIFT
COMMAND
CAPS LOCK
fn
HOME
END
PAGE UP
PAGE DOWN
CLEAR
Processing identifies these keys as CODED, which can be tested for with key == CODED. Some of the above keys have special signifiers when they're pressed, like
UP, DOWN, LEFT, RIGHT, which can be tested for as well with keyCode. Let's write some code for detecting the arrow keys:
PROCESSING
Example 5-19: Move with the Arrow Keys
int x = 215;
voidsetup() {
size(480, 120);
}
voiddraw() {
if (keyPressed && (key == CODED)) { // If it’s a coded keyif (keyCode == LEFT) { // If it’s the left arrow
x--;
} elseif (keyCode == RIGHT) { // If it’s the right arrow
x++;
}
}
rect(x, 45, 50, 50);
}
Now let's make it work on all arrow keys
PROCESSING
Example 5-19 (extended)
int xVal = 215;
int yVal = xVal;
voidsetup() {
size(480, 480);
}
voiddraw() {
if (keyPressed && (key == CODED)) { // If it’s a coded keyif (keyCode == LEFT) { // If it’s the left arrow
xVal--;
} elseif (keyCode == RIGHT) { // If it’s the right arrow
xVal++;
}
if (keyCode == UP) { // If it’s the up arrow
yVal--;
} elseif (keyCode == DOWN) { // If it’s the down arrow
yVal++;
}
}
rect(xVal, yVal, 50, 50);
}
Remapping values with Map
Sometimes you need to take one range of values and re-map them to another range. This happens a lot in coding, where sometimes you have some events, like the possible horizontal position of a slider button, that's different than the range of values you need to control the position of a video. For this, you use the map() function.
First, this example does some re-mapping, but without the map function:
Now let's use the map() function to do our re-mapping for us. It uses the syntax of map(value, start1, stop1, start2, stop2), where value is the value you want to re-map, start1 and stop1 is the range you're mapping from, and start2 and stop2 is the range you're mapping to. For example, here's how the map() function would re-map in a given set of parameters:
Value
start1
stop1
start2
stop2
result
map( 10,
0,
10,
0,
1000 )
= 1000
map( 5,
0,
10,
0,
1000 )
= 500
map( 5,
0,
10,
500,
1000 )
= 750
map( 5,
0,
10,
100,
500 )
= 300
Here we'll use the map function to re-map the mouse x location from the starting range of 0 to the width of the Display Window to a range between 60 and 180. It's the same code as the previous example, but we use the map() function to re-map the numbers instead of mouseX/2 + 60.