Class 12:

Note to Self

Turn on the video record in Zoom

A Better Way To Paint

Illustrator is a terrible painting tool. Sure it has a paint brush, but that doesn't mean you should use it. This is a tedious way to paint and can make for buggy files that crash and take forever to save. And, if you don't use a graphics tablet, really hard to get the results you'd get with real paint on real paper.

Here's a sample case: RomeroA_assignment2-jk3.ai.zip

Setting Bleeds

Our current project requires 1/8 inch bleed. This is required wherever ink touches the edge of the final label!

Create a new doc the size of your main label:

In the "Bleed" section, set it to .125 in.

3in x 4in artboard with .125in bleed
(The red line)

Be certain that any artwork that goes the the edge of the label/artboard, goes past the edge to the red bleed line.

Now, to make an artboard for the bottle cap. Illustrator can't do non-rectangular artboards, so you have to adapt a square artboard with a circular guide or guides to indicate the edge of the cut and artwork.

Choose the Artboard Tool near the bottom of the Tools panel

Draw out a new artboard roughly the right size (I'm targeting .75in)

While still in the Artboard tool, with the new artboard selected, enter the size in the Control Panel at the top of the screen

Draw a circle of solid color (remember, the cap is two colors, a background color drawn here, and a color fo the logo) centered and out to the bleed line

Draw another circle centered and out to edge of the artboard

With the circle still selected, choose
Menu > View > Guides > Make Guides

This turns the circle into a guide that accurately shows the edge of the printed bottle cap. Create your artwork for the cap taking the guide's edges into account.

Add your artwork. Remember that with the background is one solid color and the artwork is another, solid, color.

Die Cut Bleeds

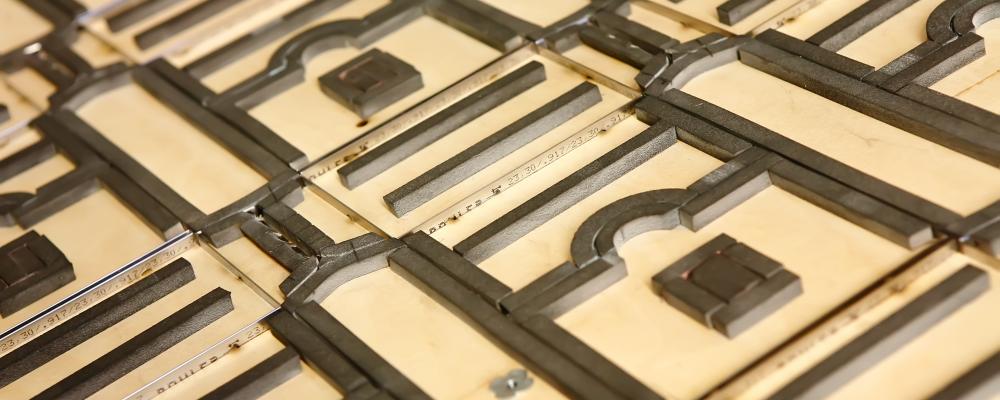
Die cuts are special dies (a kind of special shaped knife) used to create non-rectangular print jobs. Here's a company that specializes in die cut stickers, Sticker Robot.

Say you want a label that looks like this

But this art doesn't include a bleed for the die to cut into

Take the bits that go past the edge of the cut and make a copy of them and paste in place. Then add a .25in stroke to the objects (enter the "in" as part of the measurement). This centers a 1/4 inch stroke so 1/8 inch goes past the edge of the cut line. Then move the stroked objects to the back of the layers.

The artwork with correct bleed.

Bleed shown with gray pattern

Yin Yang Trick

With thanks to Mr. Brian Yee

Yin Yang Symbol Example

yinyang.ai.zip

Cool Gradient S

Based on Satori Graphics YouTube Video

Cool Gradient S Cool Gradient S

cool_gradient_S.ai.zip

Working With The Color Guide

Great slide shows: Everything you know about color is wrong...

The color guide uses Harmony Rules to create color sets you can use.

Pick a Harmony Rule from the popup menu, then double-click on the left-most color tab to apply the rules.

Click on any color to apply it to the current object.

color_harmonies-analagous

Color Harmonies: Analagous (source .ai file)

color_harmonies-complementary

Color Harmonies: Complementary

color_harmonies-pentagram

Color Harmonies: Pentagram

color_harmonies-Tetrad

Color Harmonies: Tetrad

color_harmonies-Triad

Color Harmonies: Triad

color_harmonies-shades and tints Color Harmonies: Shades & Tints

Changing Colors With The Recolor Artwork Button

This feature has been completely retooled in version 2020 and newer. Thank goodness, because it was really hard to use before.

recolor Source

Recolor Sample File (images_4recolor.ai.zip)

recolor Source

Recolor Sample File (frank_04.ai.zip)

Select one of the samples

recolor button

Click on the “Recolor Artwork” button in the control panel

recolor artwork panel

Demo:

Recolor Artwork Videos

Recoloring Artwork Illustrator How-To

Adobe Color CC

color.adobe.com

Adobe color

Color Wheel:

  • Linked to Libraries panel in Illustor
  • Uses a palette of 5
  • Use popup menu for Color Harmony Rule
  • Sliders can be set to HSB
  • Saveable
  • Taggable
adobe color image

Image

  • Allows you to upload an image and pick colors from it
  • Saveable
  • Taggable
Recolor Edit

Extract Gradient

  • Variable number of gradient stops
  • Saveable
  • Taggable
Recolor Edit

Explore

  • Search tags and trends

FX's

Can be reached in two ways: Through the Effects menu or throught the popup menu at the bottom of the properties panel

3D

Powerful, tricky to use. Completely re-tooled in Illustrator 2022. Not ready for prime-time. More later...

Convert To Shape

Convert to Shape
  • Rectangle
  • Rounded-Corner Rectangle
  • Ellipse

I have no idea why these exist. I managed to find a tutorial for a very edge-condition kind of trick, but really, who needs it?

Crop Marks

Crop Marks

Make crop marks for cutting a rectangle containing the selected object. Useful for preparing camera-ready artwork or cutting a printed object out.

Distort & Transform

FX Distort

fx_distort.ai.zip

  • Roughen...
    • Adds anchor points along the path between existing anchor points and moves them at random
    • Good way to create a more hand-drawn feel
  • Free Distort..
    • Take any corner of the selection rectangle and move it
  • Tweak...
    • Moves around anchors
    • Pretty useless
  • Pucker & Bloat...
    • Bloat takes anchor points and pulls them inward but pulls out the anchors
    • Pucker takes anchor points and pulls them outward but pulls out their handles
  • Twist...
    • Moves anchors with a twisting pattern
    • Usefull
  • Zig Zag...
    • Makes fractal like patterns by adding corner anchors
  • Transform...
    • Kinda not really an FX.
    • Allows you to do multiple transformations simultaneously
    • Can be used to create objects with multiple itterations within them
      fx_transform-2.ai.zip
transformed

Transform... (transformed.ai.zip)

Paths

Path
  • Offset Path
    • Really useful with multiple strokes applied to an object
  • Outline Object & Outline Stroke
    • Useless, probably broken

Pathfinder

Path

Similar functions on multiple objects as the Pathfinder Window, plus a few unique ones which only work on grouped objects:

pathfinder_fx.ai.zip

Rasterize...

  • Takes the object and turns it from a vector into a bitmap. Pretty much the opposite of what you should do.

Stylize

FX Stylize

fx_stylize.ai.zip

  • Drop Shadow
  • Feather
  • Inner Glow
  • Outer Glow
  • Round Corners
  • Scribble

SVG Effects

Scalable Vector Graphics (SVG) is a method of using vector graphics on the web as a file format. Cool stuff, but it's really about the saving something in an .svg file. The filters work in that format for use on the web.

FX Stylize

svg_fx.ai.zip

FX Stylize

Actual SVG graphic in a browser

<img src="http://www.khazar.com/star-blur.svg" />

SVG Code for Blurry Starr

<?xml version="1.0" encoding="utf-8"?> 
<!-- Generator: Adobe Illustrator 23.0.0, SVG Export Plug-In . SVG Version: 6.00 Build 0) --> 
<svg 
     version="1.1" id="Layer_1" xmlns="http://www.w3.org/2000/svg" 
     xmlns:xlink="http://www.w3.org/1999/xlink" x="0px" y="0px" 
     viewBox="0 0 100 100" 
     style="enable-background:new 0 0 100 100;" 
     xml:space="preserve"> 
    <filter id="AI_GaussianBlur_4"> 
        <feGaussianBlur stdDeviation="4"></feGaussianBlur> 
    </filter> 
    <symbol id="star" viewBox="-67.74 -64.42 135.48 128.85"> 
        <linearGradient 
            id="SVGID_1_" gradientUnits="userSpaceOnUse" 
            x1="0" y1="55.6988" 
            x2="7.294410e-15" y2="-63.428"> 
            <stop offset="0" style="stop-color:#F9ED32"/> 
            <stop offset="1" style="stop-color:#BE1E2D"/> 
        </linearGradient> 
        <polygon 
            style="fill:url(#SVGID_1_);
                  stroke:#2E3192;
                  stroke-width:5;
                  stroke-miterlimit:10;" 
            points="0,56.42 14.31,12.9 60.13,12.74 23.16,-14.33 37.16,-57.95 0,-31.15 -37.16,
                   -57.95 -23.16,-14.33 -60.13,12.74 -14.31,12.9 "/> 
     </symbol> 
     <use xlink:href="#star" 
          width="135.48" height="128.85" 
          x="-67.74" y="-64.42" 
          transform="matrix(0.6147 0 0 -0.6147 50 49.5171)" 
          style="overflow:visible;
                filter:url(#AI_GaussianBlur_4);"/> 
</svg> 

FX

3D

Powerful, tricky to use.

Main gotcha: don't use strokes, they won't render predictably

If you really want good 3D, use Maya or some other 3D application.

Extrude & Bevel

3d extrude

Source: 3dexrude01.ai

Revolve

Pineapple

Source: pineapple-steps.ai

3d

Source: Bottle_label-steps.ai

3d

Rotate

3d rotate

Source: 3drotate01.ai

Perspective Tool

3d rotate

Source: perspective_label.ai

3d rotate
3d rotate

Can be a little flakey, especially with strokes

Working with Symbols

Symbols

symbols.ai.zip