Misc.
- A good Logo Design blog logodesignlove.com
- A good History of Great Logo Designer at designhill.com

Let's talk about Sketching for design and illustration!
Always sketch out the bounding rectangle of your design!


Demo... example file


Great font for ligatures, swashes and embellishments: Esmerelda from Sudtipos Typography Studios
Here's a good beginner's guide


Demo...


Normal text cursor

Text cursor over a closed shape

Text cursor over an open path


Area Type Tool

Path Type Tool
Demo... example file
Uses very small and hard to see cursors to indicate editing mode:

Adjust Type on Path: Left Margin

Adjust Type on Path: Right Margin

Adjust Type on Path: Center Align and Flip Sides
Demo... example file
NOTE: There is a bug in Illustrator CC that will sometimes cause this to fail. I'm still working on figuring out how to reproduce this bug reliably, and in the meantime if you run into it, convert your text to outlines instead of using this technique.

After youv'e created the text object, select it with the Selection tool.

Open the Appearance Panel (Menu > Window > Appearance). Note that the layer 'Characters' is highlightd in the panel.

This will add a stroke (and an empty fill) above the Characters layer.

From the Stroke layer, pick a color...

Then set the stroke to twice as wide as you want it to be.

Click on the Stroke layer and drag it down to below the Characters layer.

Release and the stroke is now behind the text. And, the text is still editable!

Here's some variations on what you can do with adding strokes to text through the appearance panel...(strokes02.ai)
Stroke Help Link: http://help.adobe.com/en_US/illustrator/cs/using/WSA1E31D7D-13E6-41ac-AA8C-4AD129B9FC1Ca.html
Every non-bitmapped object in Illustrator has a path with some kind of "stroke" and "fill" (even if it's "no stroke" and "no fill")

An open path is any path with with a beginning and ending set of anchors that aren't connected to each other.

A closed path is any path in which all the anchors are connected to other anchors on both sides.

The stroke window gives control over the general aspects of a stroke, such as:

No Cap

Round Cap

Square Cap

Miter Join (default)

Round Join

Bevel Join
Corner miters control the appearance of to path segments coming together at a corner. The limit value ranges from 0 to 500, with 0 giving a chopped-off appearance to the miter (technically know as a chamfered edge), and a high value giving a pointed connection, much like the miter made by a carpenter on a wooden frame.

1 will make any angle corner a bevel

2 will turn 90° into a miter (or round) join

3 will turn 45° into a miter (or round) join

Greater than 3 will set more acute angles to miter (or round) joins

Very acute angles may need numbers over 10

500 is an outrageously high number, mostly you're less then 10. Sometimes you need a big number for curves coming together into a point:

189 limit for this example

Centered (default)

Inside

Outside

12pt dash (default). No value for the gap matches the dash size.

You can make up to 3 dash and gap sizes that repeat

Labeled Preserves exact dash and gap lengths
can lead to misaligned corners and sides. Useful mostly for open objects

Labeled Aligns dashes to corners and path ends, adjusting lengths to fit
keeps corners and side looking neat. This used to be really hard to do by hand. Added in CS 4 or 5

Handy for charts, graphics and technical illustrations.

The Width tool in the Toolbar lets you modify the width of a stroke at any point on a path.

You can change the width of a stroke at any point along the stroke with the Width Tool

And you can put gradients on paths
Use the gradient panel to control the way the stroke works on the path:

Linear gradient aligned within the stroke

Linear gradient aligned within stroke and rotated

Radial gradient aligned within the stroke

Linear Gradient along stroke

Linear Gradient across stroke
Fun with path gradients:

Get one from the Library
stylus
Makes editable paths similar to the Pen tool (demo)

vs.


The Brushes Panel

Same path, different brush

Load brushes from the popup menu in the lower left of the brushes panel


Click on the above to see at full size. NOTE: Even though they're listed here, you're not allowed to use them in this class! However, you're welcome to build your own.

Illustrator has five categories of brushes, which you'll see when you choose Create New Brush
from the brush panel. Each brush category has its own dialog to control its behavior.

Calligraphic brushes are based on elliptical shapes of various sizes. You can use a graphics tablet to vary the Angle, Roundness, and/or Size of the brush based on the pressure applied to the stylus (but don't forget to set the variability or it won't work).


Art brushes are made from existing vector graphics. Setup is fairly complicated, we'll look at some examples later in the semester.
In fact, brush design is hard. We'll cover more on custom brushes later...


Paint Brush makes editable paths without fills and strokes defined by Brushes

Blob makes contiguous areas of color with fills and invisible strokes

Double-Click the tool icon to access

With the Width
tool

Since the Paint Brush tool makes only strokes/paths without fills, it's often useful to turn it into an object whose outer visual boundary is a stroke and interior is a fill.

Use Menu>Object>Expand Appearance

Hand-drawn thing from paintbrush tool

Thing expanded into filled objects with no stroke


Thing filled with Live Paint after being converted to Live Paint object with Menu > Object > Live Paint > Make
For interesting effects!

13point star, radius 1 .8 in, radius 2 .25 in. 2pt stroke. Rotate each about 18.85 degrees (13/360/2) and scale down
First, create an object, or group of objects (without gradients, brushes or other fancy stuff)

Choose New Brush from the bottom of the Brush Panel

Set some settings, we can tweak latter...

The Scatter Star brush applied to a star

Scatter Star applied to a paintbrush path with pressure controlling size


Object to trace with curvature tool (right click to download)
Borrowed from 'Yes I'm a Designer' YouTube
| Gesture | Result |
| First click/release | Drop and anchor for start of curvature line |
| Following clicks/releases | Draw a curved line from previous anchor and drop a smooth anchor |
| Following clicks/drags | Create a moving smooth anchor. Releasing the mouse drops the anchor |
| Option/Alt click/release or double-click/release | Drop a corner anchor |
| Esc | Stop drawing line |
| Click/drag on an existing line segment | Add a smooth anchor to that point. Drops the anchor on release. |
| Option/Alt click/release or double-click/release on existing anchor | Convert the anchor from smooth to corner or visa versa |
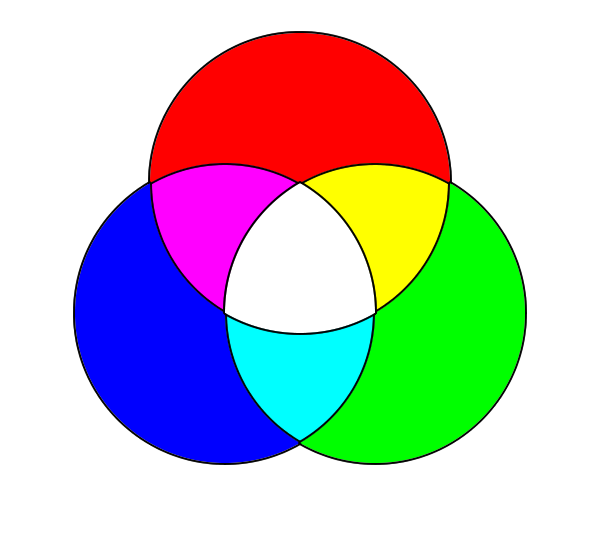
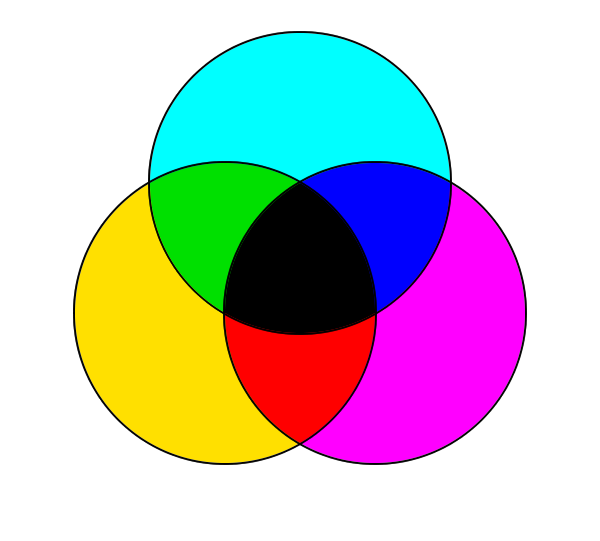

Also available are solid color cans of ink in a color system called Pantone Matching System (PMS)
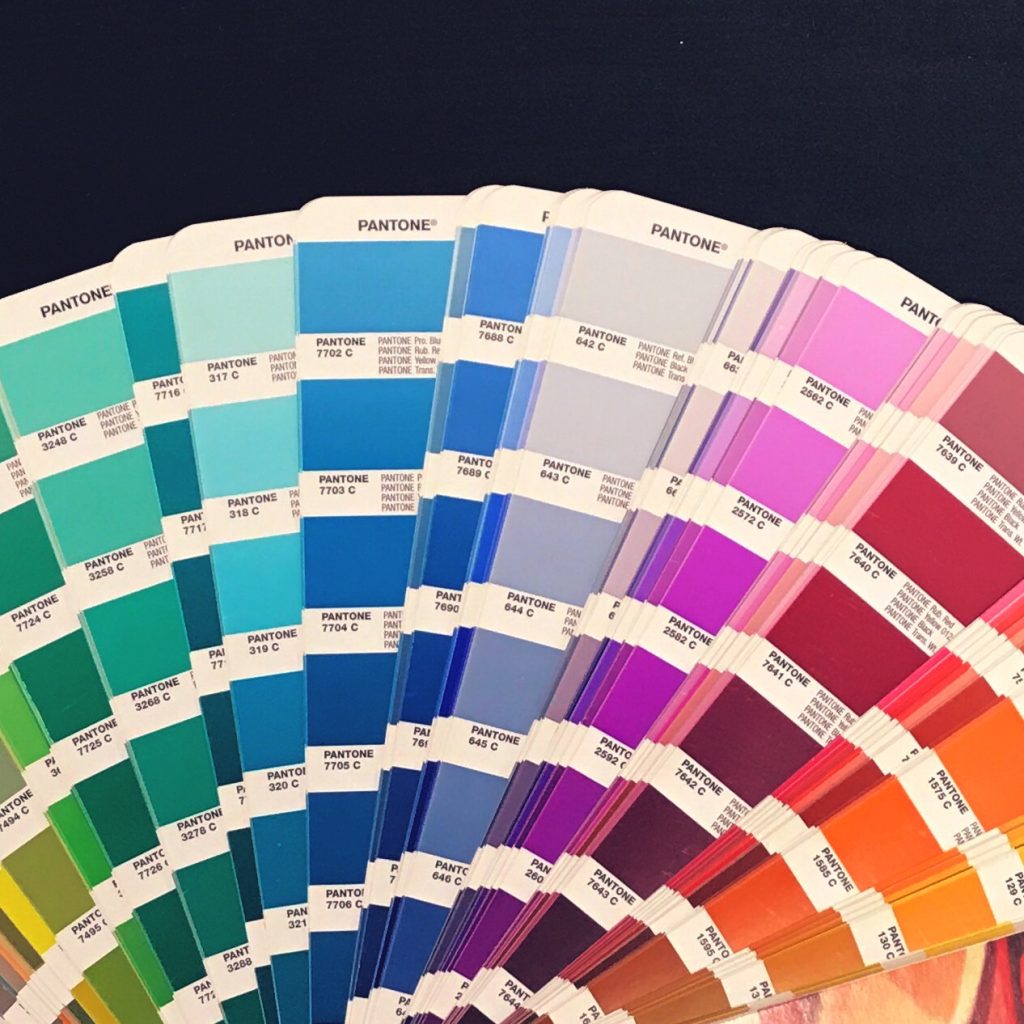
PMS colors are chosen from a color book, which also is represented in Illustrator

Our Tattoo assignment is in CMYK with PMS colors


You need to drag colors from the Pantone Color Book (Solid Coated) over to your document's color swatches panel. You get to the Pantone Color book through the menu in the lower left corner of the Swatches panel.
The color's needed are black and white, plus:


Linear

Radial

Linear Gradient Angle

Radial Gradient Angle and Aspect Ratio

Double-click on a tab to edit a color

Click below gradient band to add a new tab, click on an existing tab and drag it off the panel to delete it.

You can adjust the position of the tabs

Adjust the center point of the point-to-point spread of the gradient

Adjust the Opacity of a color tab

And Strokes can have gradients too!

The gradient tool doesn't work with gradients in strokes, but you can use the Angle to set the stroke, or use Menu > Object > Expand with only strokes, then select the fill in the appearance panel


It's easy to mess up transparency in a gradient by making the transparent color different than the solid color. They should be the same.

The right way: black to black to black gradient, with the center black at 0% opacity

The wrong way: black to white to black gradient

Demo... example file
Combining techniques
